
Abstract:
When learning something, there are some principles between every concept. Whether it is riding a bike or learning how to swim, there are fundamentals behind these things. Whether science can be applied or just learning how to do it, it is all part of the learning experience. However, learning it and spreading information requires descriptions and instructions of approaching. Getting the descriptions and instructions for a particular thing can enhance learning experiences. For this technical description and instructions, it will be evaluating how to build a PC and the fundamentals of a PC.
Introduction
There are many things that we consider technology all around us, whether it is your phone or your computer. Let’s use phones as an example. Phones have become so prevalent in our lives that we practically use it everyday. However, it is improving within each year and becomes high in demand. Same with computers. However, we have to start somewhere with computers. There are always questions lurking around wondering what is a good start to build a computer. Well if that is your concern, you have come to the right place. Here is where you can start it.

Description of a Computer
Ever wondered why people ever build a computer? Simple answer, it is a cheaper alternative. Getting a built computer with the same parts can be cheaper with buying the same part separately and building it from scratch. So what do we need to start?

Components of a Computer
- Processor: This is where your data will be crunched.

- Motherboard: This small, chip-stuffed circuit board is where the processor and RAM is stored, and where you plug in your SSDs, hard drives, networking cables, and peripherals.

- RAM: Temporary, short-term storage for task and serves double duty, handling the main memory and the memory for the on screen graphics.

- Power supply: This heavy brick of a thing converts power from the wall into the power your motherboard and processor require.
.

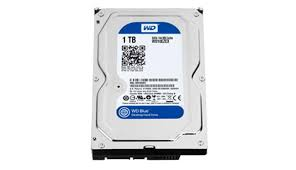
- Storage: Hard drives (HDDs) and solid-state drives (SSDs) that act as long-term storage. HDDs have more capacity and are cheaper; SSDs are smaller, pricier, but way faster.
- Case: Where all the above components are installed
.

How to Build A PC
- Make sure the case is empty, if you bought a pre-installed case, make sure to take out the case to place the desired components.
- Install the power supply within the rear the case (usually in the bottom or top corner of the case)
- Installing the Processor (if this is an Intel, going forward, I will be referring to Intel products)
- The square metal bracket holding the CPU in place is the load plate, and it’s raised and lowered using the load lever. When clamped down, the end of the load lever tucks under a hook to keep everything in place.
- Open the load plate. Do this by gently pushing down on the load arm and moving it out sideways from under the hook, and then raising it up all the way. The hook’s lever action opens the plate, which you can easily flip up.
- Use the load arm on the side to lower the plate over the chip, then push down and re-clip the arm under the hook once again. This requires some pressure to keep it down.
- You will see a slot in the motherboard. If you find a slot, put the RAM in one of the slots in the motherboard (A2 and B2 is preferable).
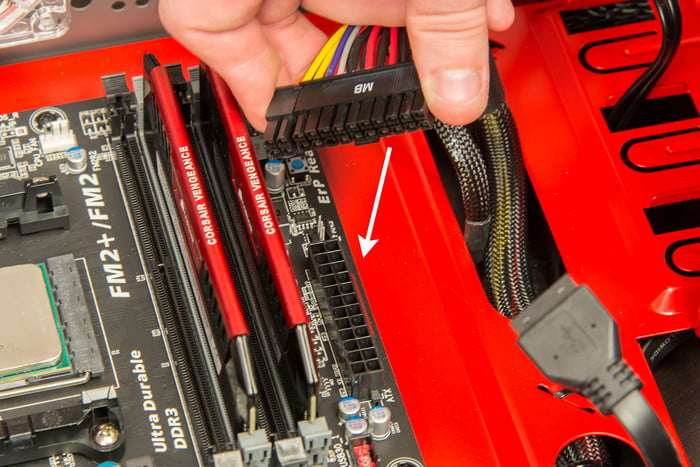
- At the back or the top, you’ll see a rectangular cut-out. This is for the motherboard’s I/O panel — the portion containing the USB, video, and Ethernet connections. Your motherboard ships with an I/O shield that fits into this rectangular cut-out. If you install that shield and then align your motherboard’s I/O panel. Connect the pin connector power to both the motherboard and the CPU. Then connect the case plugs and buttons to the motherboard.
- Plug the wires from the fan into a four-pin connection on the motherboard.
- Remove any screws for the graphics card and make sure you do not lose those screws. After that, with the ports facing the empty spot where the backplate used to be. Once it’s lined up properly, a solid push on the top of the card should cause it to snap into place as the switch clicks back in to hold it. Then screw it back in with the screws.
- Installing a drive means slotting it into a mount on the cage and aligning the screw holes on the drive’s sides with those on the cage. Make sure the drive’s power and data connectors face inwards, toward the motherboard. Once aligned, screw the drive into place.

- Make sure they are all connected properly and not placed at the wrong spots. Some examples can be that the motherboard is not placed properly in the case (give it a little tuck if not placed properly)
- With this, I hope you enjoy your new and constructed PC!
By: Melson Heo
Date completed: 5/19/20
For any more insights, look into –https://www.digitaltrends.com/computing/how-to-build-a-computer/